SSL has now become a must to serve your website over HTTPS/SSL to secure your visitors’ data and also to show that your brand cares about security. Coming to Chrome Push Notifications, although not a requirement, SSL is recommended for your main domain. There are a lot more benefits to adding an SSL certificate to your website including improving your search rankings. In this post I will show you how you can setup a free SSL (Cloudflare) on your website (do not miss the post on how to create a free website and domain name).

What is an SSL Certificate?
SSL (Secured Socket Layer) provides a secure channel between two machines or devices operating over the internet or an internal network. One common example is when SSL is used to secure communication between a web browser and a web server. This turns a website’s address from HTTP to HTTPS, the ‘S’ standing for ‘secure’.
Coming back to the SSL certificate, it is a small file that combines a cryptographic key with your organization and domain’s details. It is placed on the server to enable HTTPS protocol and based on the type of SSL certificate used, the Certificate Authority makes several checks on the organization’s information. Browser and Operating system vendors work with these Certificate Authorities to embed the Root Certificates (from which the SSL certificate is derived) within their software so that the certificate can be authenticated and a secure connection is established between the web server and the end-user.
With an insecure HTTP connection, third parties can snoop at the traffic passing between a web server and the browser to collect private data including email addresses, passwords as well as usernames. That is the reason why Google, security experts are pushing for the use of SSL on websites so that you get peace of mind that even the most basic data is secure from being intercepted.
Why do you need an SSL certificate on your website?
The internet is a wonderful place to do business because of how easy it is for your customers to find you online. The problem is, they are not the only ones taking an interest in your online activities, business or otherwise.
There are criminal elements that want your data to make a quick buck, putting your business and finances at risk. They are able to do this by intercepting communications between your website and your customers, committing what’s known as a man-in-the-middle attack.
This would certainly have an impact on your visitors who would think twice before entering any data on a website which the browser calls non-secure.
What are the different types of SSL Certificates, which one should you get?
There are three types of SSL certificates:
- Extended Validation (EV) SSL Certificates : has a strict authentication process and will add maximum signs of trust like:
The name of your company
Country abbreviation
And a visible green bar in the browser window which completely ensures your credibility is safe and secure online. - Organization Validation (OV) SSL Certificates : OV Certificate gives an enhanced visibility on who is behind the site.
- Domain Validation (DV) SSL Certificates :
Domain Validation certificate is the cheapest type of certificate with overwhelming risk of online phishing and scams It provides the lowest form of authentication, i.e. just the proof of control over an internet domain address.
How to secure your website with a free SSL certificate?
The easiest way to get a free SSL certificate is to sign up for Cloudflare.
Step 1: Create an account on Cloudflare
Enter your information and then click on ‘Create Account’
Step 2: Configure your website/domain

Add your complete website URL and click on Scan.
CloudFlare will now scan your website. Click on ‘Continue Setup’ once the scan completes.
Step 3: Configure your Website DNS Records
Once the scan is done, you will see an orange cloud next to your main domain. That means the configuration is correct. Mail and FTP are bypassed by Cloudflare and should show grey clouds.
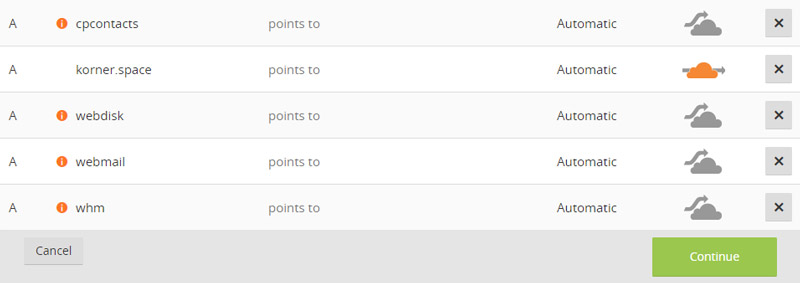
If you see the primary domain with an orange cloud, then click on ‘Continue’.
Step 4: Select a CloudFlare Plan
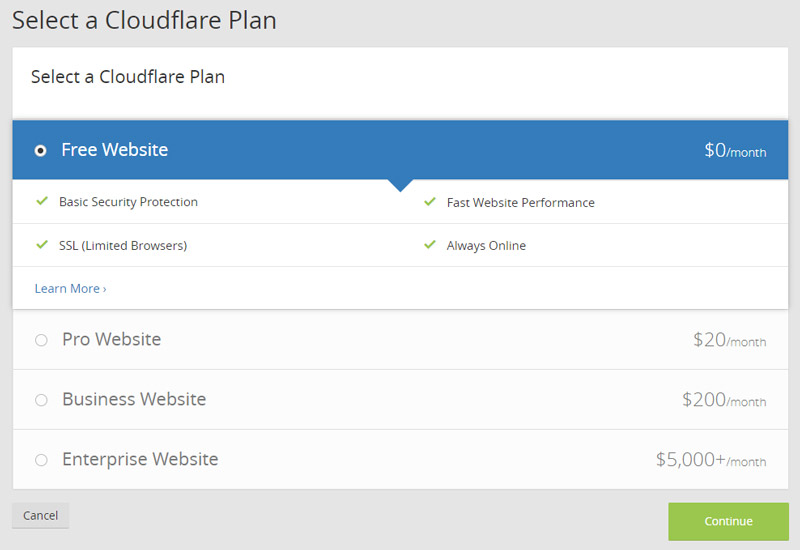
For most websites, the Free Plan would be enough. Just select it and click on ‘Continue’.
Step 5: Update your NameServers
You need to point your NameServers to Cloudflare. To do this you would have to log into your domain registrar account, find the setting to change the NameServer.

Delete the existing entries, and add the DNS that CloudFlare provided.

Once you have changed the NameServer, come back to CloudFlare and click on ‘Continue’. However, it may take up to 24 hours for the NameServers to propagate.
Step 6: Set up SSL for your website
While your nameservers are being setup, you can get to SSL configuration. Scroll down to Settings Summary and you will see SSL: Full. Click on Full and you will be directed to the ‘Crypto’ page.

Next, to the SSL option, there is a dropdown list. Select ‘Flexible’ from there. The SSL certificate will be issued in an hour or so. You can check the status from the ‘Crypto’ page once it is issued.
Step 7: Redirect traffic to HTTPS
This is the last step of the configuration. We will be setting up a page rule to redirect all traffic of your website to HTTPS.

From the website view, click on Page Rules from the top of the page. Now we need to add a couple of rules here.
You need to add www.mywebsite.com/* and mywebsite.com/* separately, and for each of these URL patterns select ‘Always Use HTTPS’. One thing to note here is that this option will only be available once the SSL certificate is issued.
The configuration will take a few minutes to go through. Once done, you can then open any page on your website, and it will open on HTTPS.